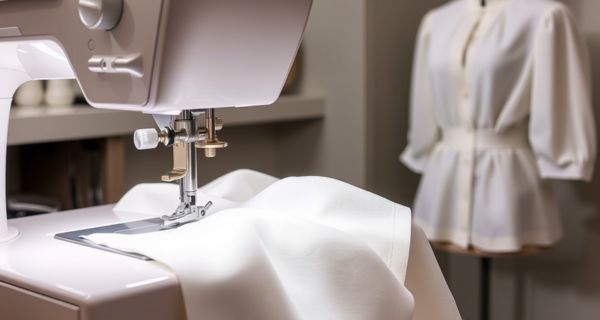
A modern blouse enhances the beauty of traditional and contemporary outfits. Many people prefer customized blouses because they offer a better fit and unique designs compared to ready-made ones.
If you love sewing, you can easily create stylish blouses at home with the right techniques. This step-by-step guide will help you understand how to stitch modern blouse designs in a simple and structured way.
Materials Required
Before you begin, gather all the essential materials to ensure a smooth stitching process:
- Fabric: Choose a material based on comfort and style. Cotton, silk, and georgette are popular options.
- Matching Thread: Using thread that matches the fabric color gives a seamless look.
- Measuring Tape: Essential for taking accurate body measurements.
- Scissors: Sharp fabric scissors will help in cutting clean edges.
- Sewing Machine: A must-have for faster and professional-quality stitching.
- Needles and Pins: Used to secure fabric layers while stitching.
- Chalk or Fabric Marker: Helps in marking patterns and measurements on the fabric.
- Hooks, Buttons, or Zippers: Used as fasteners depending on the blouse design.
- Lining Fabric (if required): Adds structure and durability to the blouse.
- Interlining Fabric: Provides additional support and enhances the shape of the blouse.
Step 1: Take Proper Measurements
A perfectly fitted blouse starts with accurate measurements. Use a measuring tape to record the following measurements:
- Bust Size: Measure around the fullest part of the bust.
- Waist Size: Measure around the narrowest part of the waist.
- Shoulder Width: Measure from one shoulder to the other.
- Armhole Depth: Measure around the armhole to ensure comfortable movement.
- Sleeve Length (if needed): Measure from the shoulder to the desired sleeve length.
- Blouse Length: Measure from the shoulder down to where you want the blouse to end.
Write down these measurements carefully for future reference.
Step 2: Select a Modern Blouse Design
There are numerous modern blouse designs to choose from. Some popular ones include:
- High-neck blouse: Offers a sophisticated and elegant look.
- Backless blouse: Best for bold and trendy outfits.
- Boat neck blouse: A stylish option that enhances the collarbone.
- Cold-shoulder blouse: Features cut-out shoulders for a fashionable appearance.
- Deep V-neck blouse: A classic and glamorous design suitable for special occasions.
Choose a design that complements your style and fabric type.
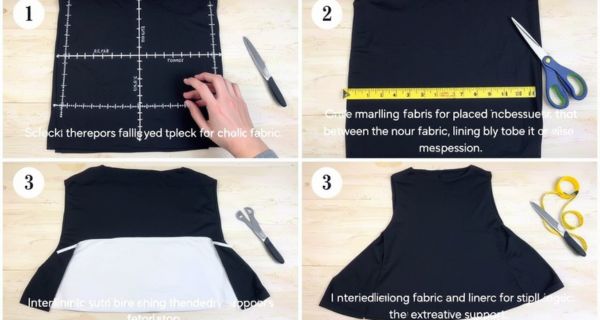
Step 3: Cut the Fabric
- Lay the fabric on a flat surface and smooth out wrinkles.
- Mark the measurements using chalk or a fabric marker.
- Add a 1-inch seam allowance on all sides to allow for stitching adjustments.
- Cut along the marked lines carefully.
- If using a lining fabric, cut it following the same measurements.
- Cut the interlining fabric to match the blouse pieces, ensuring extra support in structured areas like the bust, neckline, or back.
Step 4: Stitching the Blouse
1. Attach the Interlining
- Place the interlining fabric between the main fabric and lining fabric (if used).
- Secure it by basting (temporary stitching) before proceeding with the final stitching.
- This helps in maintaining the blouse’s shape and provides extra support.
2. Stitch the Front and Back Pieces
- Place the front and back pieces together with the right sides facing each other.
- Sew along the shoulder line using a straight stitch.
- Press the seam with an iron to make it smooth and neat.
3. Stitch the Darts
- Mark the dart points on the front piece for better fitting.
- Fold the fabric and stitch along the marked dart lines.
- This step enhances the shape of the blouse.
4. Attach the Sleeves (if needed)
- Fold the sleeve edges and sew them neatly.
- Align the sleeves with the armholes and pin them in place.
- Carefully stitch the sleeves, ensuring they are evenly attached.
5. Join the Side Seams
- Stitch the side seams, starting from the armhole down to the hem.
- Ensure both sides are symmetrical for a well-balanced fit.
6. Finish the Neckline and Hem
- Fold and stitch the neckline to prevent fraying.
- Hem the bottom edge of the blouse for a clean and polished finish.
Step 5: Add Fasteners
Fasteners help secure the blouse and add functionality. Choose the option that best suits your design:
- Hooks: Stitch them along the back opening for a traditional closure.
- Buttons: Can be added for a decorative and secure fastening.
- Zipper: If using a zipper, attach it carefully with a zipper foot for a professional finish.
Step 6: Final Touches
- Iron the blouse to remove creases and give a crisp look.
- Check all stitches to ensure they are strong and secure.
- Try on the blouse and make necessary adjustments for a perfect fit.
Tips for Perfect Blouse Stitching
- Use high-quality fabric to enhance durability and comfort.
- Double-check measurements before cutting to avoid mistakes.
- Sew slowly and carefully to ensure neat and professional stitches.
- Use interfacing and interlining in areas like collars or bust for better structure.
- Experiment with designs to create a unique and personalized blouse collection.
Conclusion
Now you have a clear understanding of how to stitch modern blouse designs at home. With practice and patience, you can create stunning and well-fitted blouses in different styles. Try out new designs and enjoy the creative process of sewing. Happy stitching.
4 thoughts on “How to Stitch Modern Blouse Designs – A Step-by-Step Guide”